Integrating an LED panel with Home Assistant via an ESP32 Bluetooth proxy
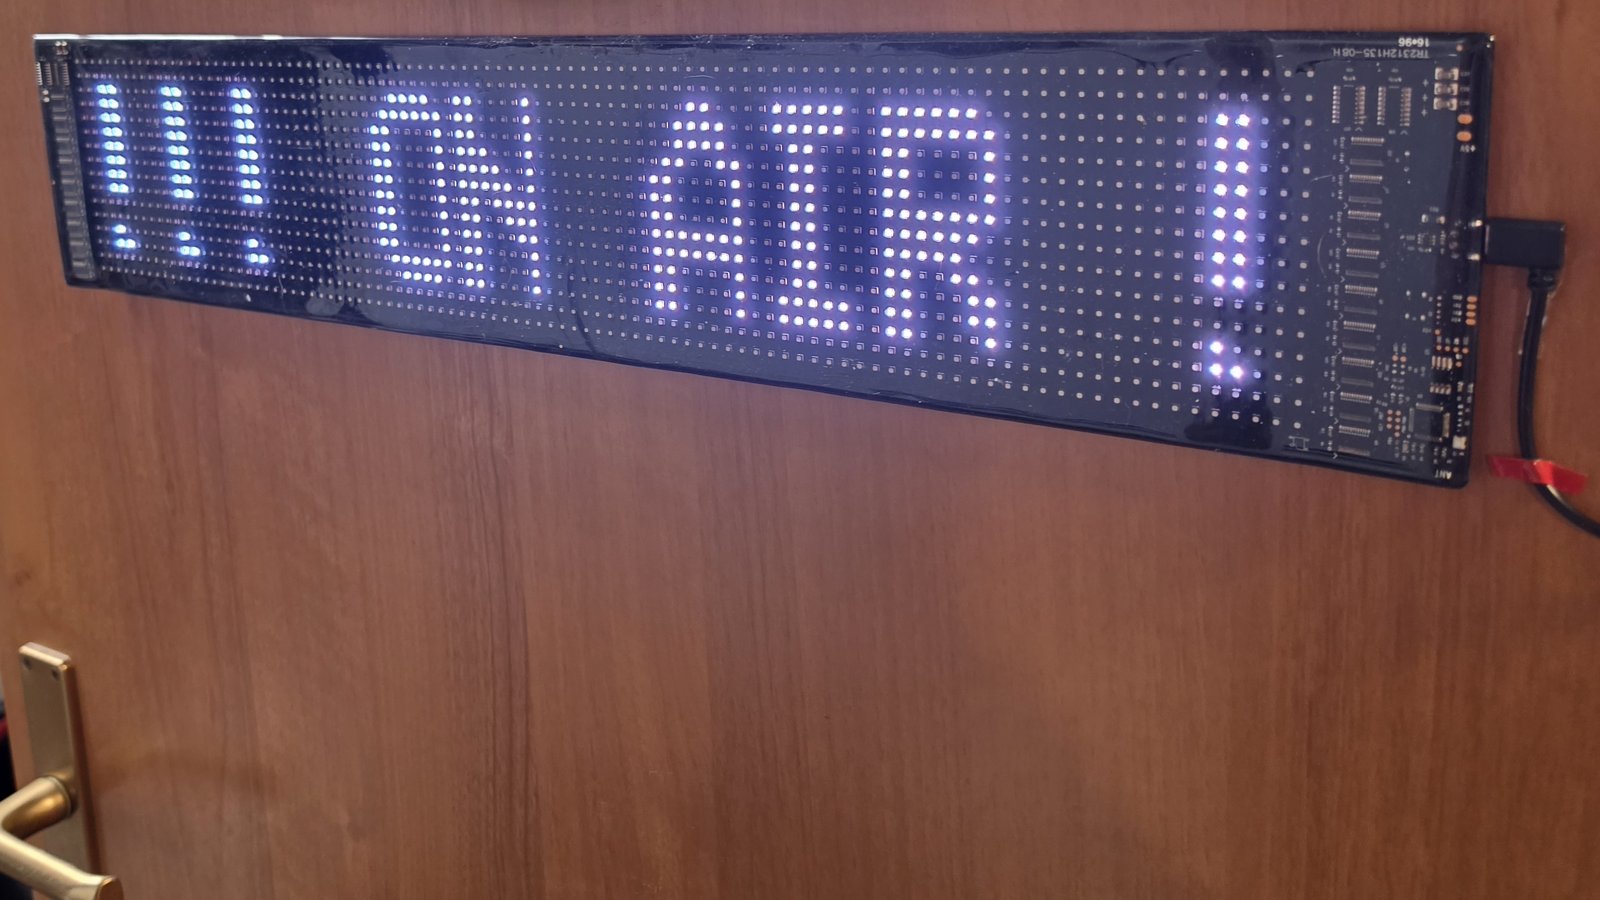
During Teams meetings my kids kept bursting into my room with all sorts of strange business, no matter what I was doing. Something had to be done, and I started dreaming of a glowing “ON AIR” sign on the closed door for the length of a meeting. Of course, so it wouldn’t be too easy, I had to complicate things a little and build a few extras around it: automation, naturally, the DevOps way! That’s what this post is about. Come on in!
The problem
I bought a flexible LED pixel panel (96x16 pixels, about 60x12 cm, USB-powered). Like many of these panels, it talks the “iPixel Color” protocol over Bluetooth Low Energy (BLE), and the only official way to control it is a phone app.
The panel has one job: it hangs on the outside of my home-office door. I work from home and spend a good part of the day on calls. When I’m in a meeting, I want the door itself to say so — “In a meeting, please don’t disturb” — so family members don’t walk in mid-call. And when I’m just working with headphones on, the opposite: “Headphones on, I can’t hear you — come in and tap my shoulder.”
The goal: the door speaks for itself — and for me.
A panel whose content only a phone app can change isn’t much use: nobody opens an app before every call. It has to be driven by Home Assistant (HA), automatically: off by default, dimmed in the evening, off for good at night. A status message when my work status calls for it.
Two obstacles:
- My HA runs as a virtual machine on a Proxmox cluster, and that VM has no Bluetooth.
- The protocol is proprietary. No vendor integration, only community projects.
Three ways to get Bluetooth into Home Assistant
| Option | How it works | Why I didn’t pick it / did |
|---|---|---|
| A. USB Bluetooth dongle, passed through to the HA VM | HA talks BLE directly | Ties HA to one physical USB port on one host. My warm-standby HA copy on another node has no dongle, so a failover would cut the panel off. |
| B. ESP32 running the panel logic in firmware | An ESPHome component emulates the phone app; HA sees an ESPHome device | My ESP32-C6 has 4 MB flash, the same limit that made the component’s author strip down his C3 build. Non-commercial licence, project winding down. Kept as plan B. |
C. ESP32 as a generic ESPHome bluetooth_proxy + panel logic in HA ✅ | The ESP only relays Bluetooth traffic over Wi-Fi; an HA custom integration speaks the protocol | Standard ESPHome feature, fits in 4 MB, independent of which host runs HA, and the same proxy can serve any other BLE device later. |
In this case, option C is a proxy bridge between Bluetooth and Wi-Fi, both ways of course. The panel logic itself stays in Home Assistant: a convenient and flexible setup.
The integration I used is ha-ble-led-pixel-display
(HACS, GPL-3.0), an actively maintained fork of an earlier iPixel integration, built on the
pypixelcolor protocol library (MIT).
Risk note: at the time of writing the fork was about three weeks old with a single author, and my panel brand wasn’t on its “confirmed hardware” list. What reassured me: these panels share one controller family, and the integration picks the geometry from the device type the panel reports, not from the brand name.
Read the README before you buy anything
Four things from the integration’s docs and issue tracker that would have cost me time:
- The panel stops advertising while the phone app is connected. Close the app before pairing with HA, or HA will never see the panel.
- A password-locked panel accepts the connection and then drops every command.
The integration exposes a
Password protectionsensor. Check it first. - Discovery works by name (
LED_BLE_…) or manufacturer data, and the proxy needs active scanning to receive the name. - Power it from a proper 5 V / 2 A supply, not a computer’s USB port (the manufacturer says so too).
Step 1: the proxy firmware
The ESP32-C6 is supported by ESPHome with the esp-idf framework. The whole config:
esphome:
  name: ble-proxy
  friendly_name: BLE proxy

esp32:
  board: esp32-c6-devkitc-1
  flash_size: 4MB
  framework:
    type: esp-idf

logger:

api:
  encryption:
    key: !secret ble_proxy_api_key

ota:
  - platform: esphome
    password: !secret ble_proxy_ota_password

wifi:
  ssid: !secret wifi_iot_ssid
  password: !secret wifi_iot_password

# Active scanning: the panel's name arrives in the scan response.
esp32_ble_tracker:
  scan_parameters:
    interval: 1100ms
    window: 1100ms
    active: true

bluetooth_proxy:
  active: true

sensor:
  - platform: uptime
    name: Uptime
  - platform: wifi_signal
    name: WiFi signal
    update_interval: 60s
The two diagnostic sensors aren’t decoration. Uptime tells you whether the ESP rebooted (it drops to zero), and Wi-Fi signal is the first thing to check when the connection gets flaky.
All credentials live in ESPHome’s secrets.yaml, never in the config you commit.
Step 2: the network (the VLAN gotcha)
My IoT devices live on their own VLAN, separate from the server VLAN where HA runs. Two things to check before you flash:
- The firewall must let HA reach the ESP on the ESPHome API port (TCP 6053). HA opens the connection, so traffic from HA’s VLAN to the IoT VLAN must be allowed.
- mDNS does not cross VLANs. HA won’t auto-discover the ESP, so you add it by IP address. That means the ESP needs a static DHCP lease, otherwise the address may change and HA loses it.
So: flash, let the ESP join Wi-Fi, turn its lease into a static one on the router, then in HA go to Settings → Devices & services → Add integration → ESPHome and enter the IP.
Step 3: the integration
- Back up HA first. A custom integration plus a restart is when you want a rollback point.
- HACS → ⋮ → Custom repositories → add the integration repo as type Integration → Download.
- Restart HA (Settings → ⋮ → Restart Home Assistant).
- Close the phone app, then add the panel.
HA picked it up through the proxy with no manual MAC fiddling. The device reported 96x16, no password lock, and exposed 29 entities: text, brightness, mode (text / text-image / clock), fonts, colours, clock options, and so on.
Step 4: tests
“It shows up in HA” is not a test. Before starting, I wrote down pass/fail criteria, and each test had to be visible on the panel:
| Test | Action | Pass condition | Result |
|---|---|---|---|
| Geometry | read width/height sensors | 96 and 16 | ✅ |
| Text delivery | send TEST 1 … TEST 5 | each visible within ~5 s, 5/5 | ✅ |
| Brightness | 10 → 100 | clearly dims, then full | ✅ |
| Clock | mode = clock, sync time | correct time and date | ✅ (see gotcha) |
| Pixel mapping | send_test_pattern action | 4 coloured quadrants, full panel, not mirrored | ✅ |
| Proxy power loss | unplug ESP 30 s, replug | control back within 2 min | ✅ (under 10 s) |
Two habits worth stealing:
- Distinguishable test data. Five different strings instead of the same one five times: if one message gets lost, you see which one.
- Record a baseline before a disruptive test. I noted the ESP’s uptime before pulling the plug. Afterwards it read one second. That’s proof of a real reboot, not an assumption.
The test pattern (red / green / blue / yellow quadrants) is the quickest way to confirm the image buffer maps 1:1 onto the physical LEDs, with nothing flipped, shifted or cropped.
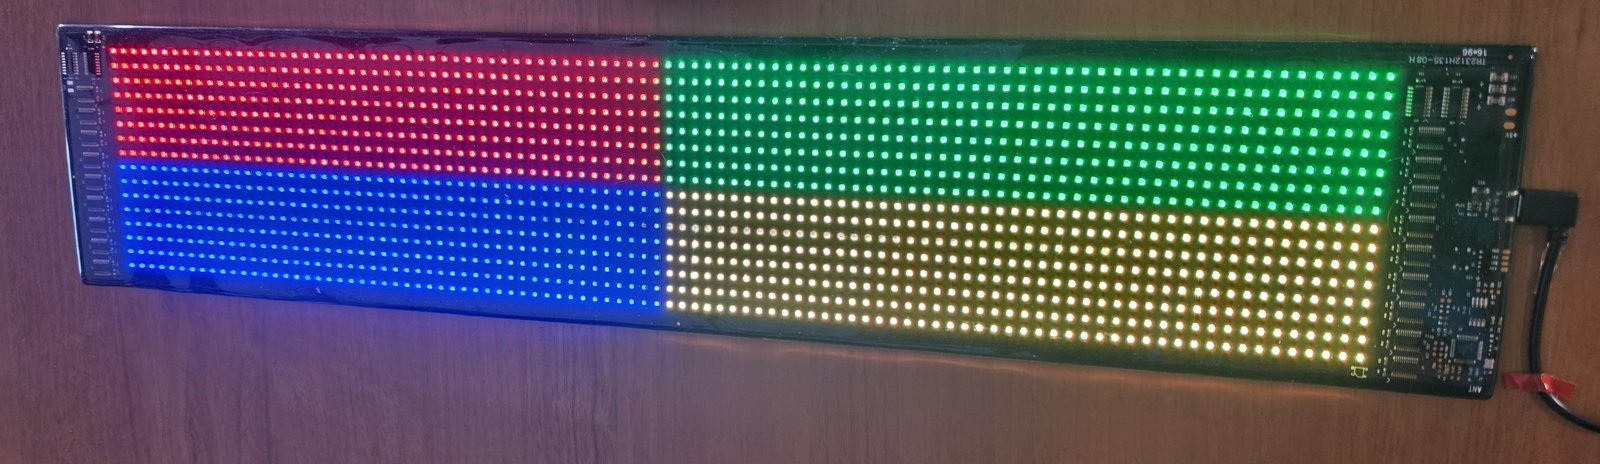 Test pattern: four quadrants, full width, nothing mirrored or shifted.
The gotcha: changing the mode doesn’t reach the panel by itself
With Auto Update enabled, text changes go to the panel immediately. Mode changes don’t.
I switched the mode to clock, and the panel kept showing the old text. Pressing the
Update Display button pushed the change, and an animated clock with seconds, date and weekday appeared.
For automations, that means:
- action: select.select_option
  target:
    entity_id: select.<panel>_mode
  data:
    option: clock
- action: button.press
  target:
    entity_id: button.<panel>_update_display
For one-off notifications, the integration also has a send_text action that carries its own
colour, font and animation per call, without touching the panel’s saved settings.
What’s not done (yet)
- Long-term stability isn’t measured. The proxy survived an HA restart and a power cut, but I haven’t run a multi-day soak test. The uptime sensor will tell.
- Young integration. Before updating it through HACS, back up HA first.
- The write-up of the door-panel logic. This post covers the plumbing: HA can now drive the panel reliably. The logic on top of it — status messages, dimming at night, meeting detection from the PC — is a work in progress, and the current configuration is on GitHub: iPixel-LED-banner. How it works is the next part.
Takeaways
- If your HA has no Bluetooth, an ESP32 running
bluetooth_proxyis usually a better answer than a USB dongle: it doesn’t tie HA to a specific piece of hardware, and one proxy serves many devices. - Keep the protocol logic in HA rather than in firmware when you can. Swapping an integration is a HACS click, swapping firmware is a flash.
- Across VLANs, forget auto-discovery. Plan for firewall rules, static leases and adding by IP.
- Write the pass/fail criteria before you touch anything, and make every test visible.